
Joel's Computer Project
| Home | www | Parts | www | Assembly | www | Setup |
| Step 1 Drive Cage |
www | Step 2 Custom Cables |
www | Step 3 Case Modification |
www | Step 4 Motherboard |
www | Step 5 Making Connections |
Step 4: Motherboard
Before doing anything to the motherboard, I looked through the entire manual. I tried to identify all the sockets, connections, and jumpers, etc.
First, I looked through the section about jumper configuration. There's jumpers for everything including the keyboard, usb ports, and the cmos. Looking at the manual and the jumpers, it seems that every single default jumper setting is exactly how I want them. I don't know if that means my system will be boring, but I would have changed the jumpers if they needed it, but they didn't. Most of them were wake-up settings. I don't need the computer to wake up just cuz I dropped something on the keyboard. I'll just hit the power button. Mostly stuff like that.
| So, it was time to install the CPU. For some reason I didn't take a picture of the chip before installing it, here's a picture of it's socket. Notice the top left corner doesn't have holes. The pins on the chip correspond so it can only go in one way. | 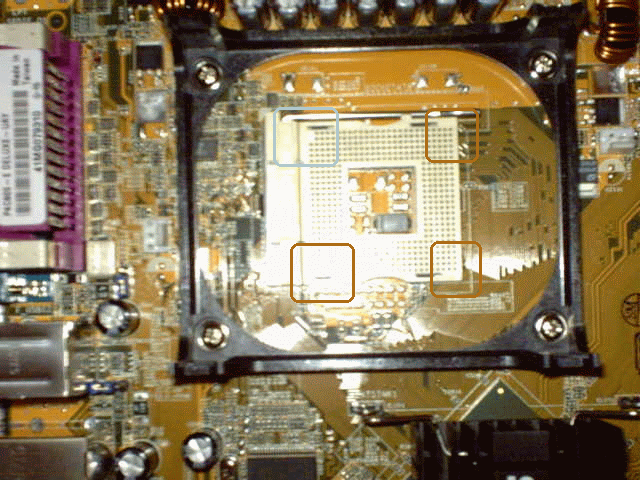 |
| So I lifted the socket lever, inserted the chip, then dropped the lever (bad pic, I know). | 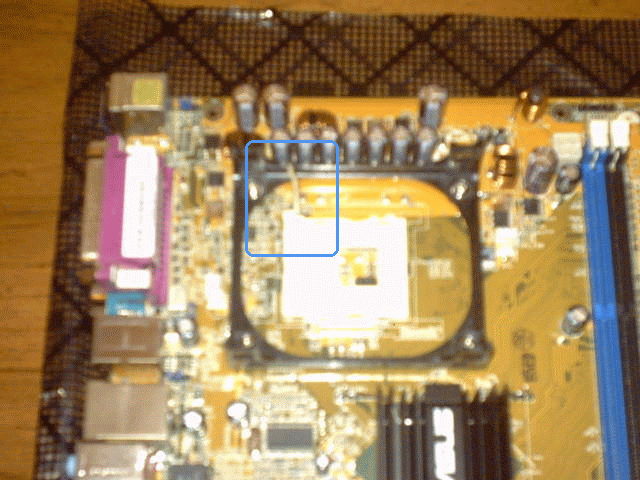 |
 |
So here's a really bad pic of the fan & heat sink that came with the CPU. I didn't know it came with one or I might not have bought one, but since I did, I decided to use the one I bought (and had already sleeved).

 |
 |
I peeled off the label on the heat sink, squirted on a little of that thermal compound, and placed the fan/heat sink on the CPU. I twisted it around a little to spread the compound, and took it back off to check to see how it spread. After a couple of tries, I got it (what I think is) good enough.
 |
 |
| Then I just mounted the fan/heat sink to the motherboard and locked it down with its little clamps. |  |
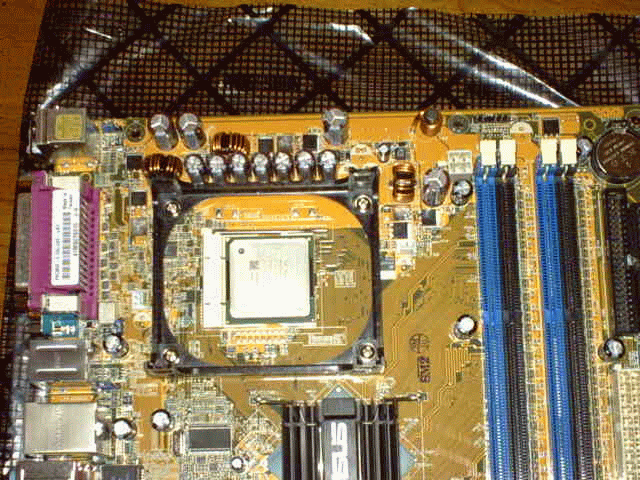
| Next, I checked the manual about the memory slots. The blue ones are slots 1 & 3 and the black ones are 2 & 4. It says if you're using 2 memory chips (which I am) you should use 2 of the same color, in my case, 1 & 3. If you can see it in the picture, the little white clips flip up to insert the chips, the snap back down when you push the chip all the way in. |  |
 |
| And, now they're in. |  |
 |
That was as much as I could do before mounting the motherboard in the case. That was pretty easy, just 9 screws. I just had to line up the I/O board with its hole on the back of the case.
 |
 |
 |
 |
Next was the video card. Pretty straight forward. I just had to figure out how you're supposed to secure it in the case. Most cases have a place to screw it in but this clear one doesn't. There's sort of a bracket that pinches the card in place. That is, if I got it right.
 |
 |
That just left the power supply, which just attaches with 4 screws.
 |
 |
| E
Step 3 Case Modification |
Assembly | Step 5
F Making Connections |